Shri Ram College of Commerce
Learning Resources
University of Delhi, Maurice Nagar, Delhi 110 007
Headings in HTML

This is a heading using the <h1> tag.
This is a heading using the <h2> tag.
This is a heading using the <h3> tag.
This is a heading using the <h4> tag.
This is a heading using the <h5> tag.
This is a heading using the <h6> tag.
HTML Formatting
These can be 'bgcolor' for background colour, 'text' for text color, 'align' for general alignment.
< body bgcolor="green" text="yellow" align="center" >
< font size="10" color="pink" align="right" >

It is similar to the effect created by the <b> tag, so these can be used interchangeably.
It is similar to the <i> tag, so these can be used interchangeably.
H 2 SO 4 (This is using <sub> tag.)
a 2 + b 2 = c 2 (This is using <sup> tag.)
 This           is an attempt        to see the
	importance of the "pre" tag..
    The statements as is displayed is not the
               same             as is put into the source..
The above statement retains all the formatting done to the source, which has been possible due to the <pre> tag. This statement uses the tag <code>. See the difference! University of Delhi, Maurice Nagar
Delhi 110 007
The above address has been written using the <address> tag.
This is the abbreviation of "Shri Ram" written using the <abbr title="Shri Ram"> tag. But this tag does not work in Internet Explorer 6 or lower. It works only in IE 7 and Mozilla Firefox, and therefore, when we put the mouse over this, the full form might not appear, depending on the browser.
This is the same abbreviation as above but created using the <acronym title="Shri Ram"> tag; the only benefit is that it would work in all web browsers. Therefore, it is preferred over the <abbr> tag.
Top
This tag can serve two different purposes - either of linking the user to an external source such as the Internet, or simply providing a link to the user to access information on the same webpage directly by clicking it.
In the first case, if suppose i want to create a link to google.com on my webpage. I will use the following HTML code :
< a href="http://google.com" > Click here to visit google homepage! </a>
Clicking on the data between the tag, I'l be taken the URL provided in the tag.
If suppose i wish to insert a picture as a link, I would simply insert a picture between the tag. We'l learn how to insert a picture later in this tutorial.
In the other scenario, in case i wish to link my text/image to a certain section within the same webpage, I will have to use the anchor tag at both the places, i.e. at the place where i insert the link in the form of text/image, and also at the point where the link destination should actually be.
At the destination point of the link, i'l place the following tag :
< a name="abc" > </a>
You can put any name you would want, in the 'name' tag, but for convenience, we generally provide a value similar to the data to which the link is being created.
At the place where you want to place the link, use the following tag :
< a href="#abc">Please make sure that the value in the 'href' attribute is same as provided in the 'name' attribute in the above tag, but compulsorily preceeded by #. This means that the link is an internal link.
Creating lists
- This is an example of a simple ordered list.
- This is the first item.
- This is the second item.
- This is the third item.
<ol> This is an example of a simple ordered list. <li> This is the first item. </li> <li> This is the second item. </li> <li> This is the third item. </li> </ol> |
- This is an example of a simple unordered list.
- This is the first item.
- This is the second item.
- This is the third item.
<ul> This is an example of a simple unordered list. <li> This is the first item. </li> <li> This is the second item. </li> <li> This is the third item. </li> </ul> |
- This is an example of an ordered list having roman numbering.
- This is the first item.
- This is the second item.
- This is the third item.
<ol type=I> This is an example of an ordered list |
- This is an example of an unordered list having list items in circles.
- This is the first item.
- This is the second item.
- This is the third item.
<ul type=circle> This is an example of an unordered |
- This is an example of an ordered list having alphabetical numbering.
- This is the first item.
- This is the second item.
- This is the third item.
<ol type=a> This is an example of an ordered list |
- This is an example of an ordered list having list items in squares.
- This is the first item.
- This is the second item.
- This is the third item.
<ul type=square> This is an example of an ordered |
Working with Images in HTML
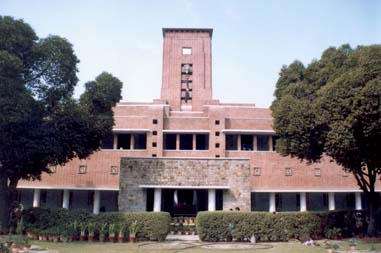

This has been inserted using the following source :
< img src="srcc1.jpg" >
In case you wish to align your image, just add an attribute in it making the tag look somewhat like :
< img src="srcc1.jpg" align="center" >
We can also get an image from an internet resource to be shown on our webpage (See Image 2).
If an internet connection is active, the image would be extracted from the given resource and reproduced on our web-page.
The source for the second image is as under :
< img src="http://www.antweb.org/images/google_earth_1.jpg" >
Top
The following two images are same, but of different dimensions.
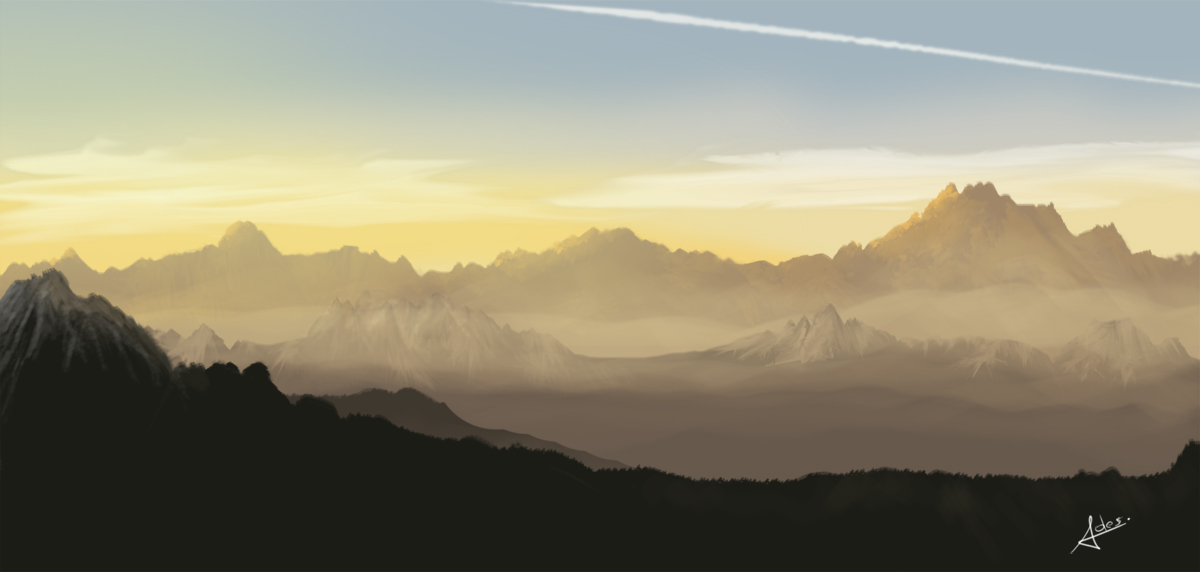
< img src="landscape.jpg" height="143" width="300" >
< img src="landscape.jpg" height="200" width="200" >
Click on the following image and see what happens!

Clicking on the image takes us directly to MS Office website.
< a href="http://office.microsoft.com/en-us/default.aspx" > < img src="office.jpg" height=150 width=175 >
In this, we try and separate sections of an image and classify them into their respective names/categories.
When the user scrolls his mouse pointer on different areas, the information related to those areas are displayed on the screen.
Consider the following image :
You will see their names appearing on the screen.
If you click on any of these names, you will be re-directed
to the object's details in the Wikipedia Encyclopedia.
This is due to "Image Mapping".
		< img src="sun.gif" height=350 width=300 border=0 usemap="#sample map" >
		< map id="sample map" name="sample map" >
		< area shape="circle" coords="140,50,30" alt="Moon" href="http://en.wikipedia.org/wiki/Moon" >
		< area shape="circle" coords="140,185,70" alt="Earth" href="http://en.wikipedia.org/wiki/Earth" >
		< area shape="circle" coords="145,400,130" alt="Sun" href="http://en.wikipedia.org/wiki/Sun" >
		< /map >
Tables in HTML
The following is an example of a simple table with 2 rows and 2 columns :
| row 1, cell 1 | row 1, cell 2 |
| row 2, cell 1 | row 2, cell 2 |
<table border="1">
<tr>
<td>row 1, cell 1</td>
<td>row 1, cell 2</td>
</tr>
<tr>
<td>row 2, cell 1</td>
<td>row 2, cell 2</td>
</tr>
</table>
To merge more rows or columns, we use the attributes < rowspan > or < colspan >. An example is an under :
| row 1, cell 1 | row 1, cell 2 | row 1, cell 3 |
| 2 columns have been merged together | row 2, cell 3 | |
| 3 rows have been merged together | row 3, cell 2 | row 3, cell 3 |
| row 4, cell 2 | row 4, cell 3 | |
| row 5, cell 2 | row 5, cell 3 | |
<table border="3">
<tr>
<td> row 1, cell 1 </td>
<td>row 1, cell 2</td>
<td> row 1, cell 3 </td>
</tr>
<tr>
<td colspan=2> 2 cols have been merged together </td>
<td> row 2, cell 3
<tr>
<td rowspan=3> 3 rows have been merged together</td>
<td> row 3, cell 2</td>
<td> row 3, cell 3 </td>
</tr>
<tr>
<td> row 4, cell 2 </td>
<td> row 4, cell 3 </td>
</tr>
<tr>
<td> row 5, cell 2 </td>
<td> row 5, cell 3 </td>
</tr>
</table>
Cellpadding is used to create more white space between the cell content and its borders. Cellspacing is used to increase the distance between the cells.
Without cellpadding:
| First | Row |
| Second | Row |
With cellpadding:
| First | Row |
| Second | Row |
Without cellpadding:
<table border="1">
<tr>
  <td>First</td>
  <td>Row</td>
</tr>
<tr>
  <td>Second</td>
  <td>Row</td>
</tr>
</table>
With cellpadding:
<table border="1"
cellpadding="10">
<tr>
  <td>First</td>
  <td>Row</td>
</tr>
<tr>
  <td>Second</td>
  <td>Row</td>
</tr>
</table>
Without cellspacing:
| First | Row |
| Second | Row |
With cellspacing:
| First | Row |
| Second | Row |
Without cellspacing:
<table border="1">
<tr>
  <td>First</td>
  <td>Row</td>
</tr>
<tr>
  <td>Second</td>
  <td>Row</td>
</tr>
</table>
With cellspacing:
<table border="1"
cellspacing="10">
<tr>
  <td>First</td>
  <td>Row</td>
</tr>
<tr>
  <td>Second</td>
  <td>Row</td>
</tr>
</table>
Forms
The following is an example of a comprehensive form :
	<form name=detail action="sorry1.html" method="get">
	First Name <input type=text name="first name">
	Last Name <input type=text name="last name">
	Sex <input type=radio name="sex" value="Male" checked=checked> Male
		<input type=radio name="sex" value="female"> Female
	Age Group <select name="age">
		<option value="-12"> Less than 12 years </option>
		<option value="12-20" selected=selected> 12-20 years </option>
		<option value="20-30"> 20-30 years </option>
		<option value="30-40"> 30-40 years </option>
		<option value="40-50"> 40-50 years </option>
		<option value="+50"> Above 50 years </option>
		</select>
	Which "Google" services do you wish to use?
		<input type=checkbox name="services" value="mail" checked=checked> Gmail : Email from Google <br>
		<input type=checkbox name="services" value="gtalk"> Google talk : Messenger for you!<br>
		<input type=checkbox name="services" value="pic"> Picassa : You'd love to manage pictures.. <br>
		<input type=checkbox name="services" value="orkut"> Orkut : You believe in sharing your world..
	Username : <input type=text name="user"> @ gmail.com
	Enter a password : <input type=password name="pass">
	Any Comments or Suggestions for improvement
		<textarea rows=3 cols=35>Please feel free to write your view about google services.. </textarea>
	<input type=submit value="Submit">
	<input type=reset value="Reset">
	</form>
Frames
Cascading Style Sheets (CSS)
To learn about this interesting head, click here!
HTML Reference List
Website created and managed by Manav Jain, B. Com. (H) 2nd yr, Sec. B